Popular Pages
PPTP VPN Setup Tutorial Mac OS 10.5
Apple is known in making tasks easy and straight to the point. Setting up your Mac’s PPTP VPN is an example of this because it couldn’t be simpler.
- Click on System Preferences, and then click the Network icon.
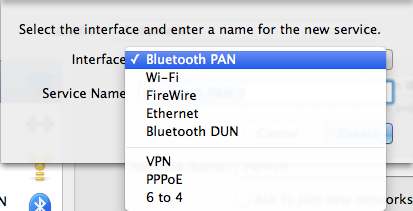
- On the left, you’re going to see a list of your available network connections. We are going to add a new connections so click the plus symbol at the bottom of that list. Under Interface, pick VPN.

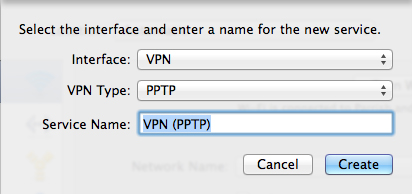
- A new option will appear, you need to select PPTP on the VPN Type option. The next option lets you name your VPN service, and you can call it whatever you want.

- Click the Create button when you’re ready.
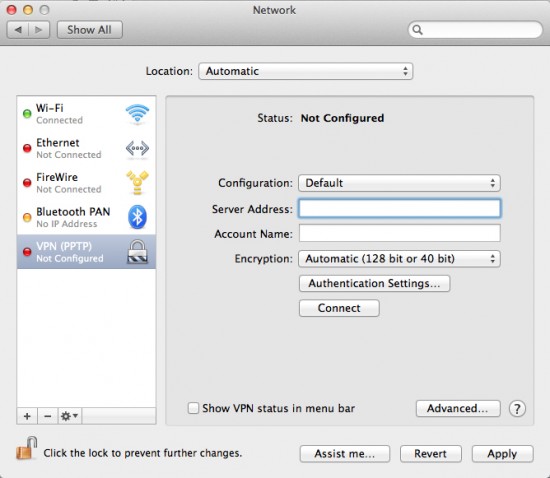
- Now your VPN will be listed in that sidebar menu, but you still have to configure it. You need the info given to you by your VPN provider, enter the server address and account name.

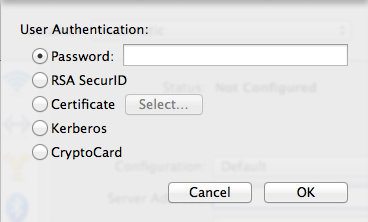
- Click the Authentication Settings button and type in the password your VPN provider gave you. Then click OK, and then Connect.

Credits to applegazette.com for the tutorial and Images
